Book Categories:


Understanding the anatomy of a bottle and measuring parts of a bottle is essential for accurately matching the specifications of closures, preforms, and other complementary components, as well as for effectively controlling accessory procurement costs.
This article will start with the measurement of key parts of a bottle such as the bottle neck, body, and base, systematically outlining the measurement points, commonly used tools, and key considerations for each parts of a bottle. Helping you communicate more effectively with accessory suppliers and obtain clearer technical guidance.
This will help you avoid unnecessary issues such as pricing errors due to mismatched specifications, repeated sampling, returns and exchanges, and delivery delays—along with the associated costs and inconveniences.
1. Essential Tools to Measure Parts of a Bottle
Before diving into the detailed measurement of different parts of a bottle, it is useful to first familiarize ourselves with the common tools involved in the measurement process.
On the one hand, this will help you accurately match tool names with measurement terminology as you read through the following sections, avoiding any confusion caused by unfamiliar terms.
On the other hand, we will also briefly explain the differences in measurement accuracy among various tools and how these differences may affect procurement and specification selection—helping you make more informed decisions in practice.
1.1 Vernier Caliper
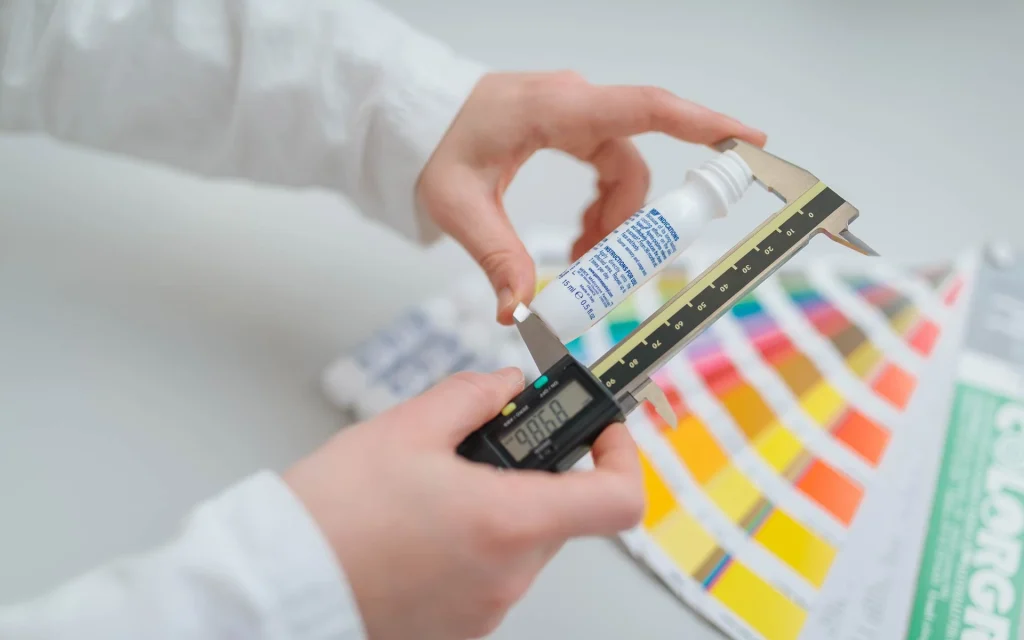
The vernier caliper is the most commonly used measurement tool in bottle container design and bottle production quality control. It can be used to measure both external dimensions—such as diameter and width—and internal dimensions, including bottle neck inner diameter, neck finish height, and bottle depth.
Electronic vernier calipers commonly available on the market offer a display accuracy of up to 0.01mm, with standard measuring ranges typically including 0–150mm and 0–300mm. The 0–150mm model is compact and easy to handle, making it suitable for measuring small parts such as the bottle neck and body diameter. The 0–300mm or longer models are better suited for measuring total bottle height, though their longer scale bars may reduce maneuverability when measuring fine or intricate areas.
1.2 Ruler
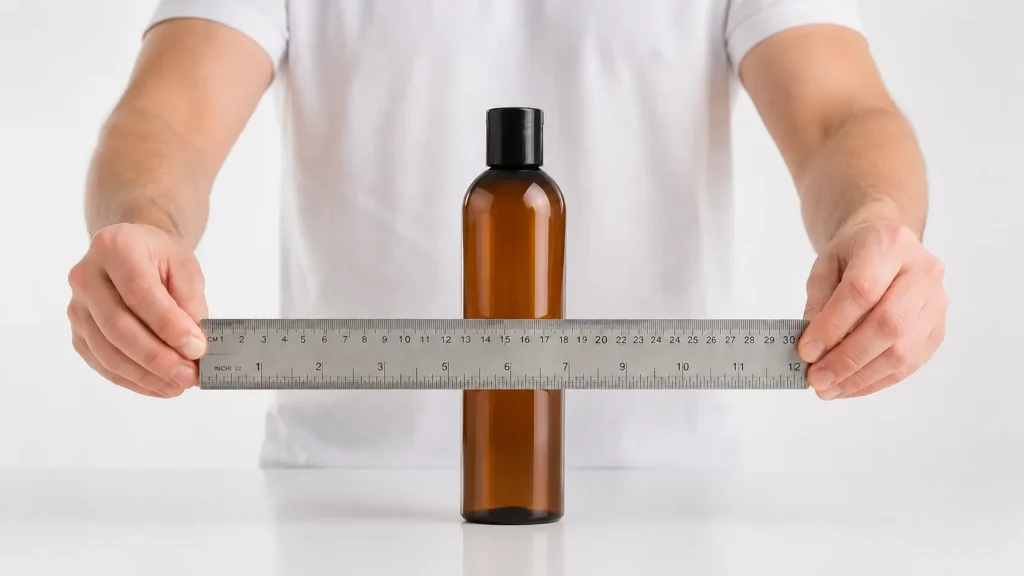
If you are not a packaging manufacturer or designer, the tool you are most likely to use for measuring parts of a bottle is a ruler rather than a vernier caliper. While rulers offer intuitive readings and simple operation, they often struggle to provide accurate and reliable data when measuring neck finishes, body curves, or especially irregularly shaped bottles.
Regardless of whether you use a vernier caliper or a ruler, manual measurement inevitably involves some degree of error. However, the margin of error differs significantly between the two. Measurements taken with a vernier caliper are typically accurate to within ±1mm, while ruler measurements can have errors of 2mm or even more—due not only to the positioning of the ruler but also to parallax errors in reading.
A difference of one or two millimeters may seem negligible in some areas, but when it comes to bottle neck dimensions, a 2mm deviation often means a completely different neck finish specification and preform type—potentially rendering the selected closure or pump unusable and jeopardizing the entire packaging solution.
1.3 Flexible Tape Measure
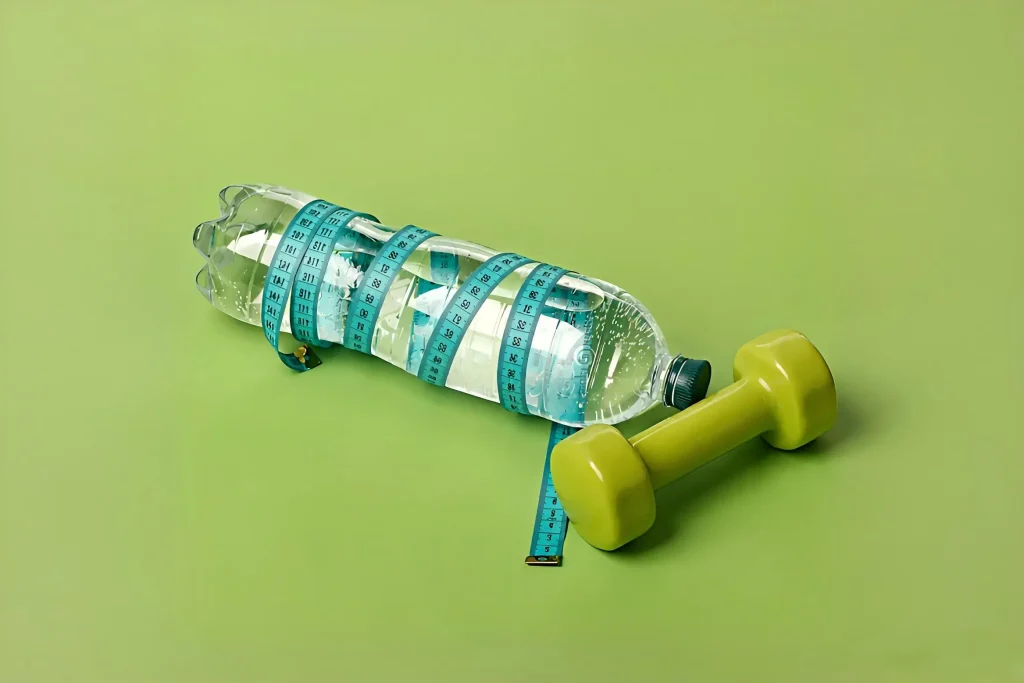
Whether you are a bottle manufacturer or not, we recommend keeping a flexible tape measure in your measurement toolkit. When measuring curved surfaces, body contours, or die-cut patterns of irregular bottles, a tape measure conforms more closely to the bottle surface than a vernier caliper or ruler, providing more intuitive and accurate data.
Of course, tape measures also have a certain margin of error. However, due to their soft material, they can fit tightly against curved surfaces, making them more effective than rulers for measuring irregular parts of a bottle. That said, tape measures are not commonly used for standard cylindrical or square bottles—their primary application remains in capturing dimensions of irregular structures.
1.4 Height Gauge
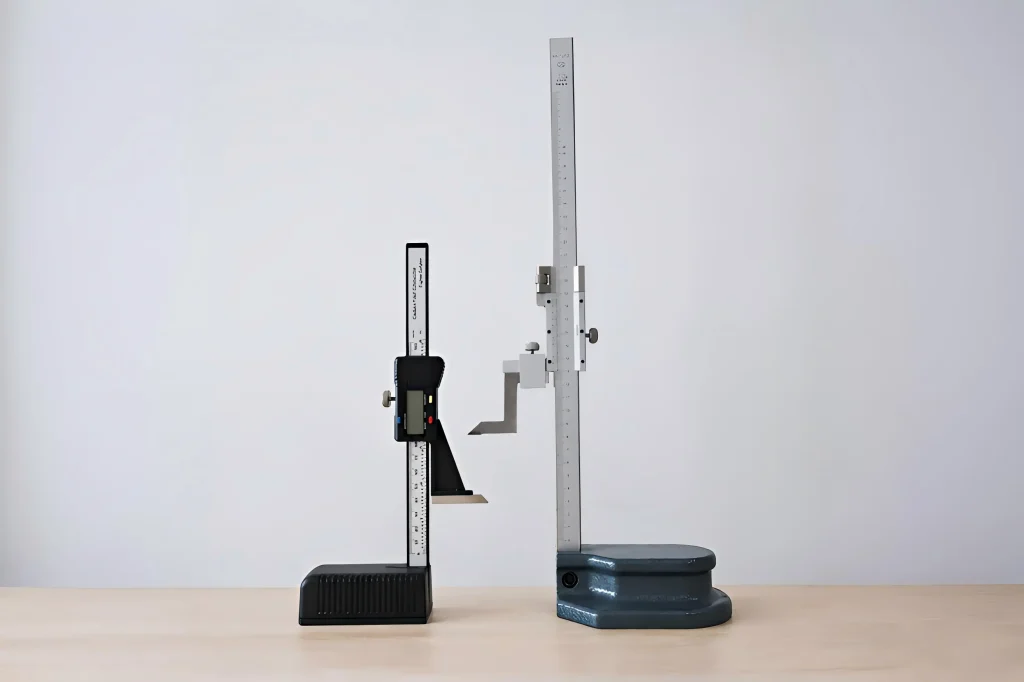
Although a vernier caliper with a large measuring range can also be used to measure bottle height, we recommend using a dedicated height gauge for bottles with a capacity exceeding 100ml. The reason is that longer calipers become less stable to hold and more difficult to maneuver, which tends to result in greater measurement deviations.
Some height gauge models are equipped with digital displays that provide direct readings, effectively eliminating parallax errors associated with visual reading. In addition, these instruments typically feature a sturdy metal base, allowing the bottle to be placed vertically on the platform for measurement—offering far greater stability than handheld measuring, thus ensuring consistency and reliability of the data.
In terms of gauge selection, we recommend prioritizing models with a measuring range of at least 0–300mm, which is sufficient to cover the height measurement needs of the vast majority of bottles under 1 litre in capacity. For larger bottles with a capacity of 1 litre or above, where the height often exceeds 300mm, we suggest opting for a gauge with a range of 0–500mm or more, ensuring measurement can be performed without the need for adjustment or splicing—making the operation more convenient and efficient.
1.5 Digital Weight Scale

The gram weight of a bottle is an important factor influencing packaging costs, as it directly relates to wall thickness and durability, and also serves as a key reference for estimating bottle capacity. Therefore, when evaluating bottle size or capacity, gram weight is a critical metric that should not be overlooked.
When measuring the actual capacity of a bottle, the standard procedure is as follows: first, place the empty bottle on the scale and tare it (zero out the weight), then add the contents until the liquid level approaches the bottle neck. The reading on the digital scale at this point indicates the actual capacity of the bottle.
It is important to note that packaging manufacturers typically use water as the test medium for capacity measurements. However, since the density of water often differs from that of the actual product formulation, this may result in a discrepancy between the measured and actual fill volume. Therefore, we recommend using the actual formulation to verify capacity once you receive the packaging samples, to obtain more accurate data.
Additionally, actual capacity measurements are generally not based on “full mouth” capacity, as the subsequent assembly of pumps or caps requires sufficient headspace to prevent overflow.
In terms of equipment selection, we generally recommend using a precision electronic balance. These instruments offer accuracy ranging from 0.01g to 0.001g, with higher precision generally commanding a higher price. Beyond accuracy, it is also important to ensure that the maximum weighing range of the selected model meets your testing needs—for example, some models have a maximum capacity of only 500 g or 1L, which may not be sufficient for larger bottles.
2. Anatomy of a Bottle
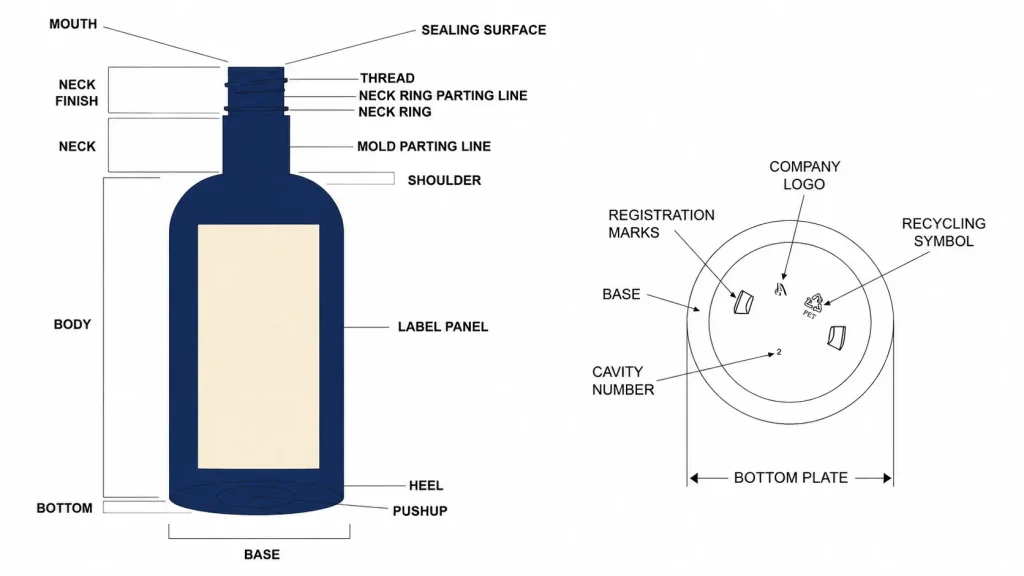
Now that we have familiarized ourselves with the basic tools for measuring bottles, let us move on to a more detailed examination of the various parts of a bottle. Becoming familiar with the terminology and measurement methods for each section not only facilitates clearer and more efficient communication with your packaging supplier, but also enables more precise control over design execution and cost management. Below, we will break down each key parts of a bottle one by one.
2.1 Bottle Mouth – Inner and Outer Diameter Measuring
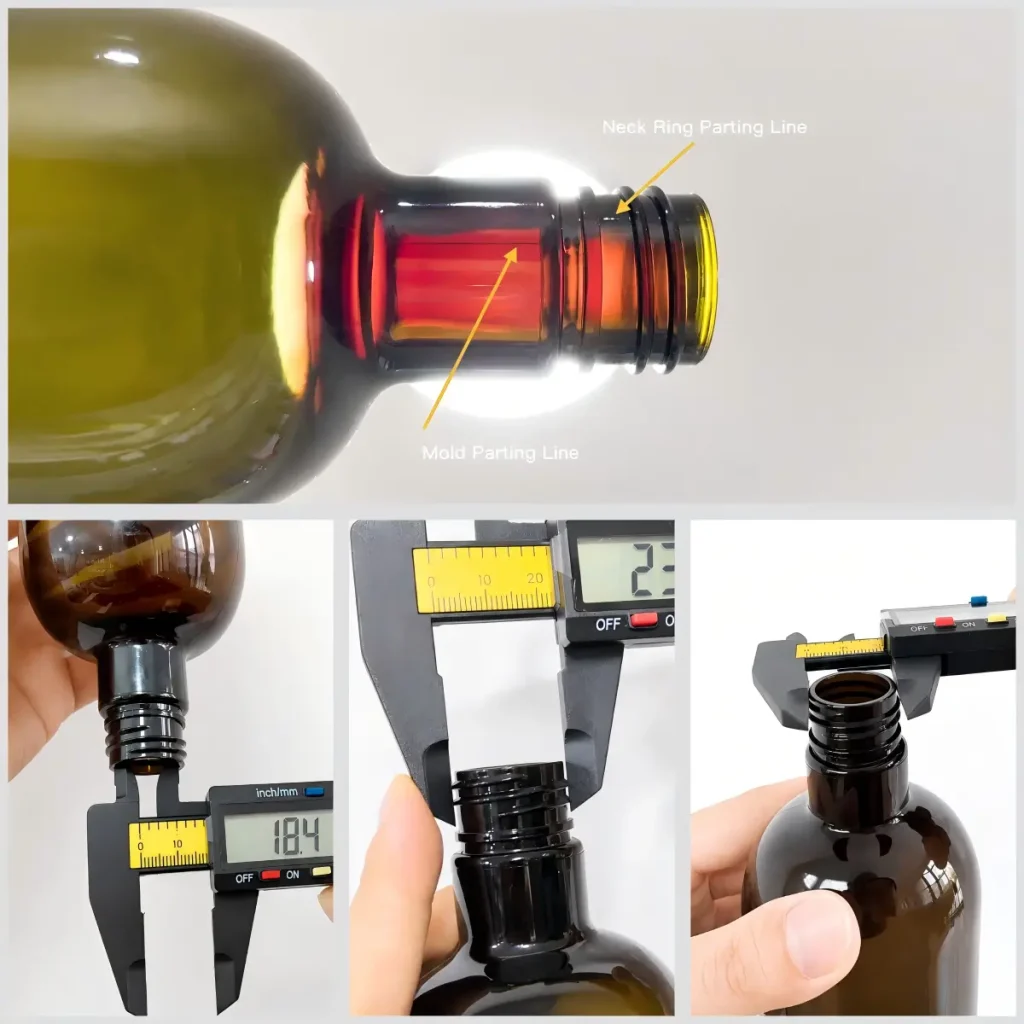
The bottle mouth is located at the very top of the container, and its most critical dimensional parameters are the inner diameter and outer diameter. These two values not only determine the compatibility of filling nozzles during the production process, but also serve as the primary basis for selecting neck sealing accessories such as pull-tab sealing discs, inner plugs, and foil induction liners. For products like makeup removers, face creams, and toners, precise measurement of both the inner and outer neck diameters is particularly important.
When measuring the inner diameter of the bottle neck, the upper jaws of a vernier caliper are typically used. However, one important point to note is that if the measurement is intended for selecting foil sealing or foil liner accessories, the outer diameter measurement should exclude the thread area—it should be taken from the smooth, unthreaded portion of the bottle mouth. Please refer to the picture above for the correct measurement method.
In addition, extra care should be taken when measuring the inner diameter of wide-mouth jars. In some cosmetic jars, the inner wall of the container is not perfectly vertical but features a slight curve. In such cases, the inner diameter near the rim should be used as the reference dimension for selecting the appropriate pull-tab sealing disc. To determine whether the pull-tab sealing disc fits properly, use the following criterion: once the sealing disc is inserted into the bottle mouth, it should fit snugly and not fall out easily when the bottle is turned upside down. If the seal is too loose, it will not provide effective sealing or product protection, which may compromise the product’s shelf life.
2.2 Neck Finish – Thread Finish Measuring
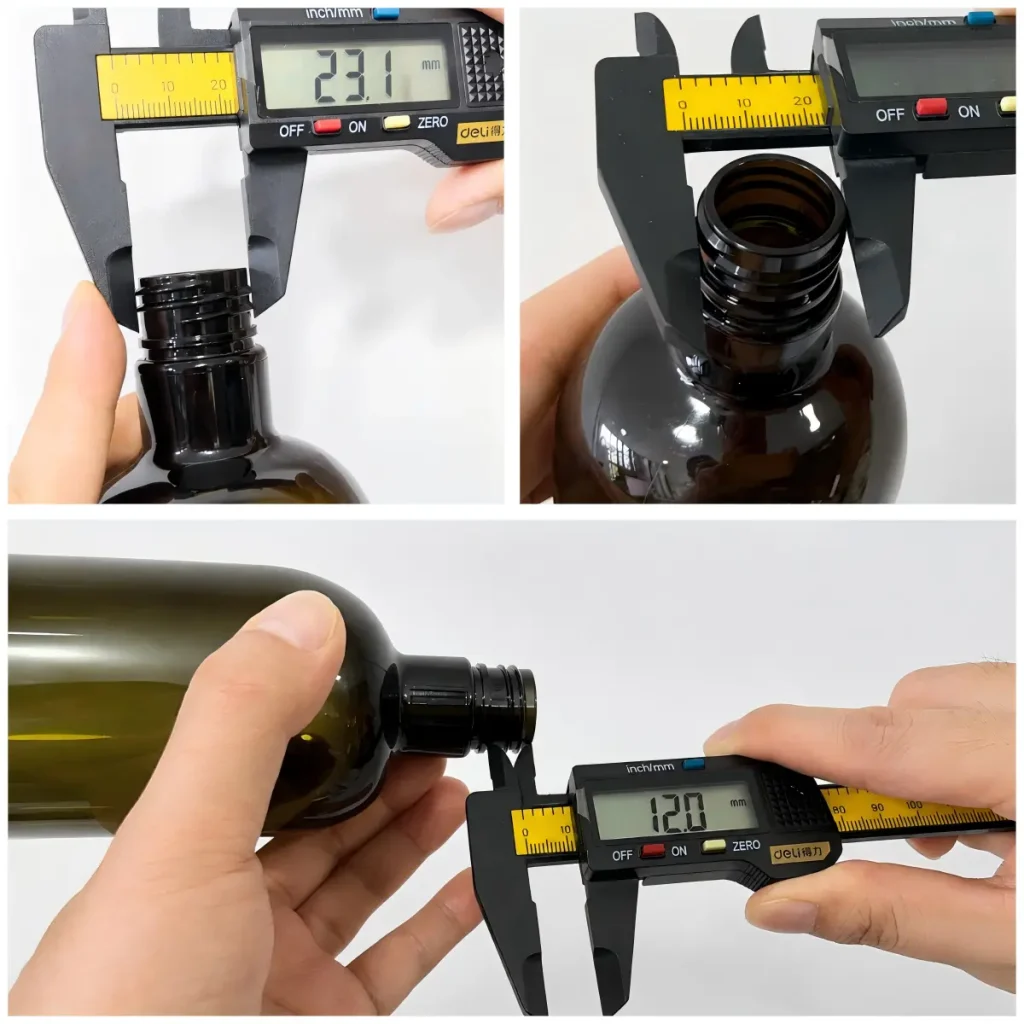
The neck finish refers to the entire section from the rim of the bottle mouth down to the neck ring (support ring). Its most critical dimensional parameters are the thread outer diameter and the neck finish height. Typically, the thread outer diameter is measured to preliminarily determine the preform specification, and then combined with the neck finish height to further filter compatible pumps or closures.
The neck finish is one of the most critical parameters of a Preform (the intermediate product in plastic bottle manufacturing), and is directly linked to preform classification standards. When measuring the neck finish outer diameter, we recommend positioning the vernier caliper vertically across the threaded area of the neck finish (avoiding the support ring), and aligning the measurement with the parting line on the finish—this yields the most accurate data.
If the parting line is not clearly visible or the neck finish has an interrupted thread design, you may also measure the thread outer diameter horizontally with the vernier caliper, which will still provide a reliable reading.
In addition, closures with the same thread size may vary in height, and the same applies to pump dip tube lengths. Therefore, when measuring neck finish for accessory matching, be sure to record the neck finish height along with the thread diameter. This will allow the accessory supplier to recommend a more precise solution, reducing the need for repeated sample shipping and testing due to dimensional mismatches.
2.3 Neck Ring – Support Ledge Functions
Not all container packaging is equipped with a support ledge—only bottles blow-molded from preforms (primarily PET and PP bottles) have this structural feature. Containers formed through extrusion molding or single-step blowing molding typically do not include a support ledge.
Whether to choose a bottle with a support ledge depends on the level of automation in the PET blow-molding equipment and the specific application of the bottle. Though inconspicuous, the support ledge plays several important roles in the production and use of PET bottles:
1. Conveying Stability
The support ledge ensures smooth transfer of preforms through highly automated injection, blow-molding, and filling production lines, effectively preventing the preform from slipping or shifting during transfer to the blow-molding machine—ensuring smooth processing. Also, when it comes to product filling, some filler on the filling machine is going to hold it during the filling process.
2. Deformation Resistance
The support ledge enhances the structural strength around the neck area, helping to prevent localized deformation during heating, stretching, or high-pressure blowing—such as neck expansion or thread warpage.
Furthermore, if your bottles require high-temperature sterilization before filling, the support ledge design provides additional structural stability, making it an important selection parameter in such applications.
3. Stress Distribution
The support ledge helps distribute the torque generated when tightening or loosening the closure, reducing the risk of thread fracture due to stress concentration. This design is particularly valuable for packaging that involves frequent opening and closing—common water bottles, for example, typically feature a support ledge.

In the cosmetics packaging sector, the support ledge is often included more for decorative purposes. In consumable categories like water bottles, where production volumes are large and automation levels are generally high, the support ledge is a standard feature.
In cosmetic packaging, however, achieving a customized decorative support ledge design usually requires dedicated preform molds. For example, in a custom preform we developed for a client, we enlarged the support ledge to create a distinctive bottle silhouette.
This design not only enhances visual recognition but also offers a degree of anti-counterfeiting protection—since modifying the neck finish mold is costly, the barrier to imitation is higher. As such, this approach adds both aesthetic value and a layer of brand protection.
2.4 Bottle Neck and Shoulder
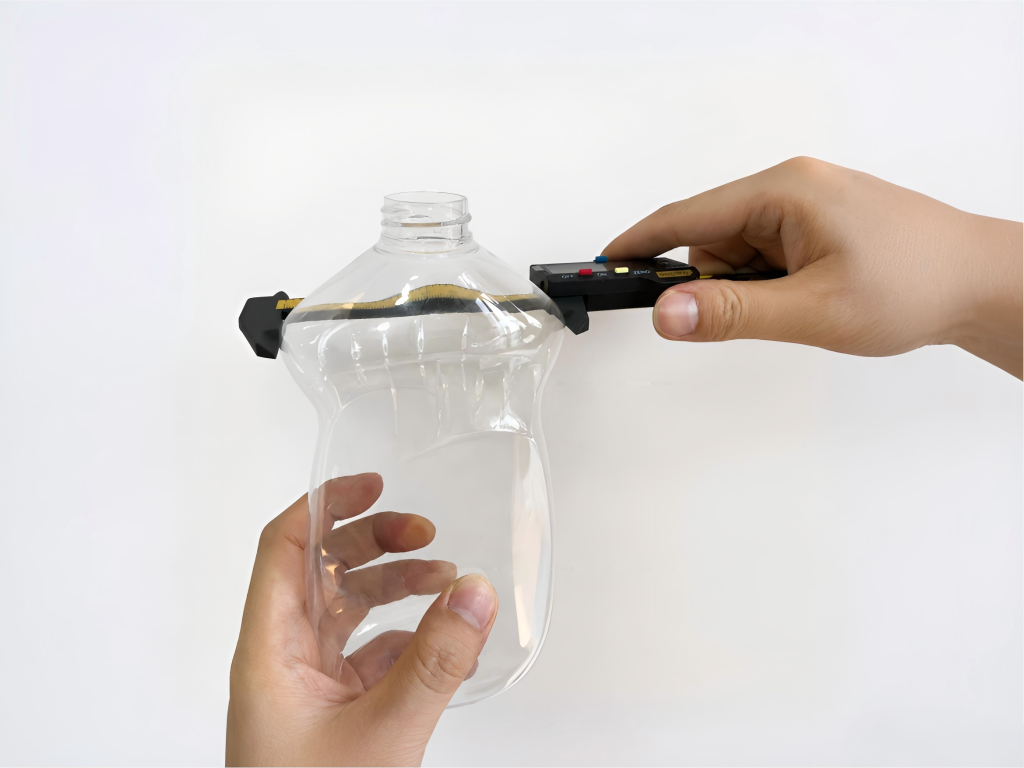
Not all bottles have an elongated neck like the one shown in the picture above. Bottle body shapes vary widely, and shoulder structures are not always designed with smooth rounded transitions. These two areas are not typically subject to routine measurement, unless you plan to replicate the bottle exactly through mold development, or need to apply specific label decorations or printed graphics at the neck or shoulder.
If measurement of the neck and shoulder areas is indeed required, we recommend using a flexible tape measure or vernier caliper to collect basic dimensional data. These measurements typically provide designers with a general directional reference, allowing them to roughly reconstruct the bottle form in CAD.
When measuring these two parts of a bottle, note the following: for irregularly shaped bottles, the shoulder width should be measured horizontally across the widest and narrowest points of the shoulder area to help the designer accurately capture the flowing curves of the shoulder profile. The same logic applies to thickness measurement—record both the maximum and minimum thickness values for reference.
2.5 Bottle Height

Bottle height is generally divided into three different dimensions: shoulder height, body height, and overall height. Measurements of bottle height and diameter are among the most critical reference data affecting packaging customization and shipping costs. Measuring the height of different bottle sections typically involves the use of a vernier caliper or a height gauge.
Shoulder height refers to the distance from the bottle shoulder to the base. The primary purpose of measuring shoulder height and bottle diameter is to determine the effective area for silk-screen printing or labeling.
As a general rule, silk-screen graphic designs should leave a margin of approximately 10mm at both the top and bottom of the bottle. This is because during the printing process, the bottle is held at both ends by clamps to rotate it—the 10mm margin is reserved for the clamps, and no printing can be applied in these areas. Of course, 10mm is a common industry standard; some factories may require only 5–6mm, in which case the printable area becomes larger and the visual result more impactful.
For regularly shaped bottles such as cylindrical or square bottles, the measurement approach for label dimensions is essentially the same as for silk-screening. For irregularly shaped bottles, however, a flexible tape measure is recommended to conform to the bottle surface and identify key reference points for determining the label curvature. The label line drawing—also referred to as the die-cut template—not only defines the available space for graphic design but also serves as an important parameter in determining label pricing.
Body height refers to the distance from the bottle mouth to the base. Measurements of body height and neck finish height directly guide the customization of pump dip tube length and pump gasket thickness. Neck finish height is typically measured using the depth rod at the end of a vernier caliper: place the depth rod at the support ring, extend the caliper until the base reaches the bottle mouth rim, and read the value—this gives the neck finish height.
Overall height refers to the full height of the bottle once the closure or pump is assembled. This measurement mainly affects the custom sizing of outer packaging. Skincare products typically range from 30ml to 100ml, so a vernier caliper is usually sufficient for measurement. For larger bottles such as those used for hair care products or cleaning agents, a height gauge is recommended to ensure accurate readings.
2.6 Bottle Base
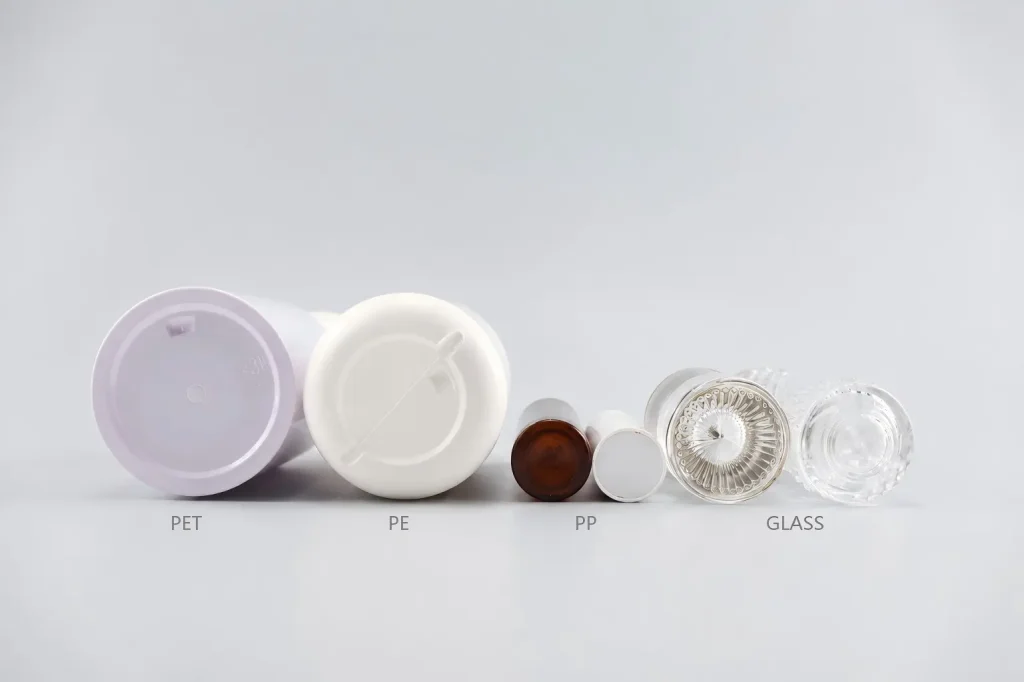
Compared to other parts of a bottle, the base may seem the least noticeable. However, understanding the structure and design details of the bottle base can still provide you with valuable information.
Most plastic bottle bases typically include three basic elements: the recycling code, the positioning groove, and the mold cavity number. These elements serve as important references for packaging suppliers in terms of production traceability and material identification.
In contrast, glass bottle bases tend to have more complex surface textures, but the overall variety of elements is actually fewer than on plastic bottles. The texture on glass bottle bases is not always intended for aesthetic purposes—more often, it is designed to increase friction with the contact surface, ensuring the bottle sits more stably and is less prone to slipping.
Without having a physical sample in hand, packaging suppliers can often make a preliminary judgment about the bottle’s forming process and material type by examining the center area of the base.
Generally speaking, blow-molded PP or PET bottles have a small circular mark at the center of the base. If the bottle is injection-molded, this mark will show a distinct indentation. For extrusion-blow-molded PE bottles, there is no center dot—instead, a horizontal parting line runs across the base. These subtle process marks are useful clues for identifying the manufacturing method used for the bottle.
3. Measuring Different Bottles
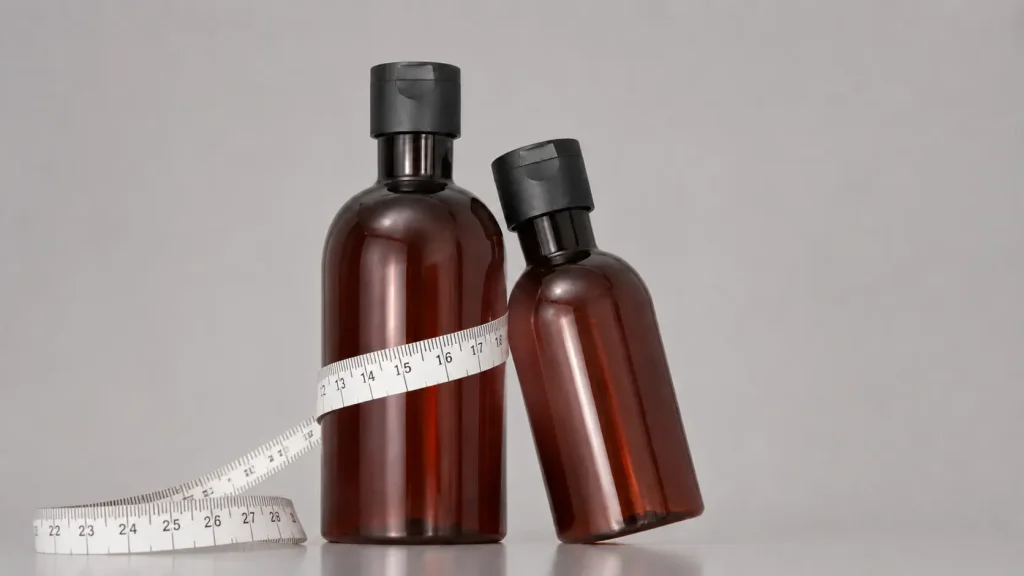
For designers and packaging manufacturers, bottle measurement is by no means a routine data collection task—every measurement value reflects information that directly or indirectly affects subsequent mold development, accessory selection, production costs, and even logistics expenses.
At the same time, mastering the measurement methods and data interpretation for each critical parts of a bottle helps establish a unified technical language between packaging manufacturers, designers, and brands—reducing miscommunication and minimizing the need for repeated sampling and rework due to dimensional misunderstandings.
If you still have questions regarding the actual measurement of bottles, or would like more specific guidance on a particular bottle type, please feel free to reach out to us. We would be happy to provide one-on-one measurement assistance and can also offer tailored container solutions based on your product positioning and packaging needs.